
Apple Tart


I saw this in the November/December Cooks Illustrated magazine and thought it might be nice instead of baking an apple pie. I'm thinking of making it for Thanksgiving. It was absolutely less work and I would say as good as an apple pie but a little different. This is definitely impressive looking and really is not that complicated to make. The press in crust is a breeze.

I added cinnamon to the recipe. I fail to understand how you can bake anything apple without adding cinnamon to it. As I've mentioned before, I'm a cinnamon freak. I added a little nutmeg too. They recommend using a 9" tart pan but I only have a 10" It came out fine in the 10" The crust was probably a little thinner but it was fine. I also used granny smith's instead of golden delicious. You need to use an apple that is going to stand up a bit to the heat and not turn to mush. In the base of the tart I mixed granny smiths with Fuji. I wanted the base to be a little sweet to contrast the tartness of the grannies from the top.

Apple Tart (Adapted from Cooks Illustrated)

Crust:
1 1/3 c flour
5 T sugar
1/2 t salt
1 t cinnamon
1/2 t nutmeg
10 T butter, melted

Whisk flour, sugar, salt, cinnamon, and nutmeg in a bowl. Add melted butter and stir until dough forms.  Press the dough into a 9" (or 10") tart pan (with removable bottom). Press until the thickness is even on the bottom and up the sides.  Using the bottom of a metal measuring cup to press the bottom smooth makes it easy. Place on a sheet pan and bake on the bottom shelf of a 350 oven for 30-35 minutes, until slightly brown and firm.

For the Filling:
10 golden delicious apples (or granny smith or other firm baking apple)
3 T butter
1 T water
1/2 c apricot preserves
1/4 t salt
1t cinnamon

Peel and cut 5 apples into thin slices. I usually cut an apple like this: 

Yes you are observant - this apple is not peeled
 Cut the apple in half from the top down 


Cut either "cheek" off the half. You are now left with a center wedge with the core.

Stand the apple on end and slice the core off. 


Now you're ready to cut the wedges into slices.

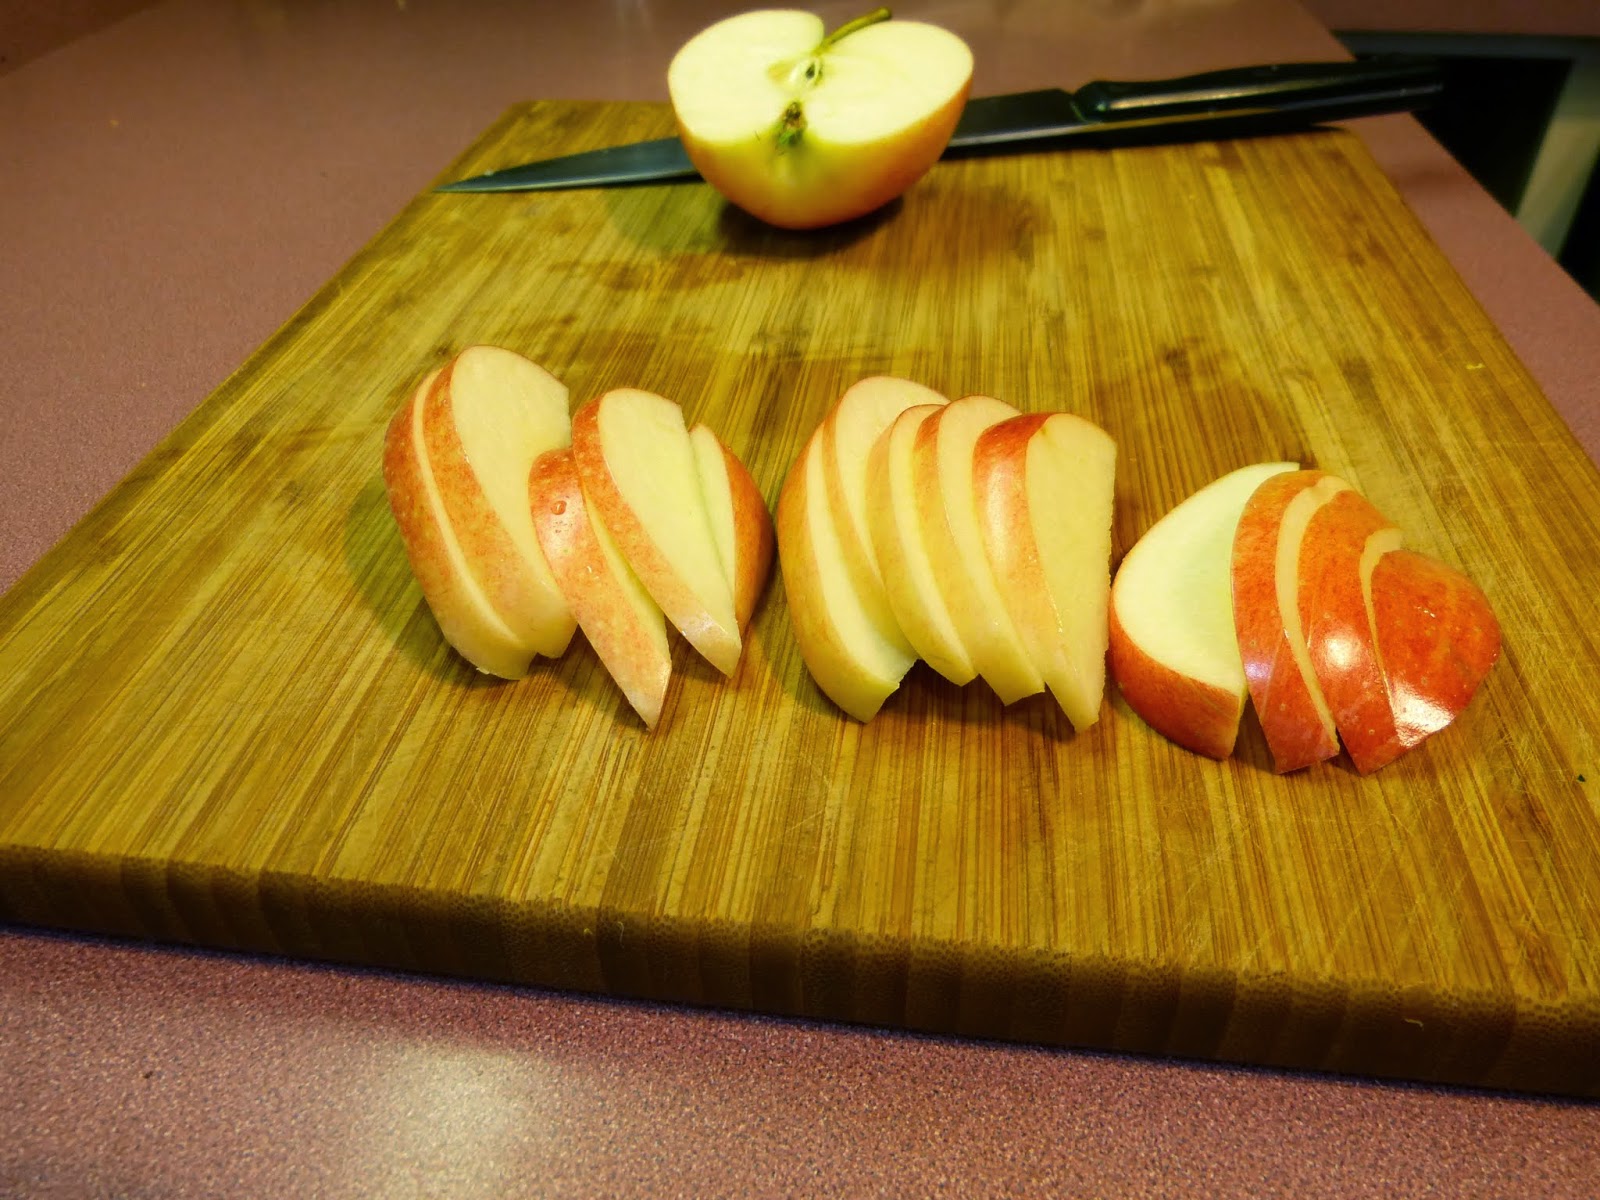
 You get very uniform apple slices this way and very little waste.
 Okay back to the recipe.

In a 12" skillet melt 1T of butter and add apples, water and cinnamon. Toss to combine. Cover and let cook until apples are slightly pliable - about 3-5 minutes.  If you are using the granny smiths, you need to cook them a little longer. Remove from skillet and spread them in a single layer on a baking sheet to cool.

While apples are cooking, heat apricot preserves in microwave. Reserve 3T and set aside. Peel and cut remaining apples into 1" chunks. Melt the remaining 2T of butter in the skillet. Add remaining preserves to skillet. Add cinnamon and salt. Cover and cook for about 10 minutes until very soft, stirring occasionally.  Mash apples with a potato masher and continue to cook until some of the liquid is removed and it is reduced to about 2 cups.
Apple puree
Transfer apple puree to baked tart shell. Spread evenly in bottom.  Reserve 5 of the thinnest apple slices for the center. Beginning the outer edge, shingle the apple slices on top of the puree. Bend the reserved slices into the center.
Ready for the oven
Bake for 30 minutes in 350 oven. Turn on broiler. Reheat preserves in microwave. Brush tart with apricot preserves (avoid the crust). Broil tart until the apples caramelize. Let cool completely before serving. Remove tart ring and slide the tart off the bottom onto a serving platter.

Patience, Patience, waiting for it to cool
When it comes out of the oven it is really pale looking and looks like you didn't even bake it. So it is totally necessary to put it under the broiler with the apricot preserves spread on top. It really finishes it off nicely.  I did not make any whipped cream but I think a nice dollop of that would go quite well. So yes I am thinking about breaking with tradition and making this for Thanksgiving (I'll let you know how that goes over).

Comments

Popular posts from this blog

Tomato Risotto

Want to build up those arm muscles.  There is no better way than to do up a good risotto. You will get tired of stirring but it is oh so worth it. Tomato Risotto 1 onion, chopped olive oil 2 clove garlic, minced 1 1/2 c Aborio Rice 1/2 c white wine 4 medium-sized tomatoes, peeled about 1 cup warm vegetable stock (may need additional) 1 t fresh oregano 1 T fresh torn basil 2 T fresh parsley salt/pepper Parmesan cheese In a dutch oven, saute chopped onion in olive oil.  Add a little salt to help the onions along.  Meanwhile prep the tomatoes. Squeeze tomatoes gently just to rid them of the seeds. You do not need to get rid of all the liquid. Chop the tomatoes into large cubes. Cook onions until translucent. Add garlic and cook until fragrant. Add rice and saute for a few minutes until the rice smells toasted. Gradually add white wine and stir until almost all of the wine is absorbed. Add tomatoes to the rice. Add the oregano and basil. Stirring constantly until a

New Kid on the Block

So here's a picture of the new kid on the block. Ain't she a beauty? It's a Blomberg . They are fairly new to the US. They have been around in Europe for quite a while. I really liked the design. I've been dying to have a freezer on the bottom. With the old refrigerator I would constantly lose brain cells by hitting my head on the freezer will poking around in the refrigerator. It really makes sense to have the refrigerator on top - that is where you spend most of your time. When we bought the old one, it was an emergency situation. The prior one was leaking on the floor and was no longer cooling. Fifteen years ago the freezer on the bottom was just starting to get popular but we were in no situation to wait for delivery. We had to take what they had on hand. Now the freezer on the bottom is by no means unique. What is - is this freezer's design. There are 3 compartments in the freezer. I used to have a chest freezer in the basement and everything would get los

Go Gadget Go

Don't you just love a good gadget? I love one that is functional - usually with several functions as a matter of fact.  I don't really like a one-trick pony type of gadgets.  I like multi-taskers. Sometimes you have to settle for a one-trick pony and that's OK. Sorry I couldn't resist - the girls always loved Inspector gadget when they were young. I especially love the intro! My Mom's friend is moving and she's been clearing out her kitchen.  She knows that I'm a big kitchen person so she gave me a bunch of things that she thought I might put to good use (Thanks Terri).  She's given me some pretty nice things in the past too. She's given me some cake-decorating tools, some copper molds, cookie cutters, spritz cookie gun, etc. Here's what I got this time around: I'm excited about the two spatulas.  The one is really flexible. I already have the mini spatula (from Pampered Chef ) and love it. Sometimes though when lifting things